Managing photos with iPhoto + Flickr
This weekend I worked on setting up an organizational system for my digital photographs. Up until this point I've just been dumping pictures into folders, roughly organized by trips and dates. There were several problems with this system: there was no easy way to find pictures of specific people, it was difficult to browse through just the good photos, and they weren't automatically shared with anyone unless I manually uploaded them somewhere myself. It required too much work to upload and share photos that I often never got around to it.
I needed to find a system which would keep the photos organized and automatically share them on an internet site like Flickr for me. I looked at a lot of different photo apps and Flickr clients, and ultimately decided to use iPhoto. Its Flickr compatibility has some limitations, but it goes far beyond any other system in terms of ease of use. Here's how my setup works:
After a trip or a day of taking photos, plug in the camera to the computer. iPhoto pops up and offers to download all the pictures and automatically sort them into "Events". Events are just collections of all the photographs taken over a certain time period. It defaults to splitting by days, but you can also split the events between certain photographs:

This works fairly well for a first level of organization. The events contain every single photo taken, even if you took 10 photos of a certain object in order to get the perfect shot - that's OK. We'll sort out the good photos from the rest when we get to the Album layer later. You can leave all the originals in the events and not have to worry about losing them.
While still working with the events, it's only a few clicks in iPhoto to automatically tag all the photos with the location of the event (if your camera does not have a GPS built-in). A Google Maps window pops up and allows you to search to assign the location ("Tiananmen Square"), or drop a pin on the exact coordinates. All the photos in the event are then automatically tagged with the GPS coordinates and the name of the location.
The next step is where iPhoto really shines. The "Faces" feature scans all your photos and automatically finds people's faces in the photos. If it doesn't know who a certain person is, it prompts you to assign a name to the face. Once you assign a certain person's face in a couple of pictures, it automatically recognizes that person in the other photos. Then you just need to click "Confirm" or "Reject" on all of the other suggested faces to commit them. This will automatically tag all the photos with the names of the people in them. Overall I find that this feature works surprisingly well - you'll never want to go back to manually tagging people in photos again. Here are a few pictures of me that it automatically detected:

Next I like to pull out just the good photos, for browsing and sharing on Flickr. iPhoto has "Albums" for this, and you just need to select the good photos from an event and drag them in. One album can contain photos from multiple events, or not: how you want to organize things at this level is up to you. Unfortunately there's no hierarchy between Albums. I would have liked to create a super album called "China Trip" which contains sub albums for "Bejing", "Shanghai", etc., but it's not possible to do this. That's probably just as well because most internet photo-sharing sites don't allow nested albums either (Facebook & Flickr being the two big ones).
Once everything is organized into albums, it's only a few clicks to sync all the albums to your Facebook or Flickr account. iPhoto takes care of automatically uploading all of the pictures and syncing the metadata like the location and people tags. There's very little flexibility at this point - iPhoto will sync everything in the albums without giving you many options to control the details of what gets uploaded (for example, if you had kids you might not want to sync the names or photos of the kids). However, if you keep these limitations in mind while making the albums, it works out fine.
And that's it - once you have everything set up, then there's very little "maintenance" work that you have to do with the photos. Just plug the camera in, name the event, accept the detected faces (assuming it's already been trained), and pick out the best photos for an album that automatically gets syncd up to Flickr or Facebook. You don't need to manually tag or upload anything (unless you want photo-specific tags like "street vendor" or something like that, which are significantly easier to tag right in iPhoto than on the web).
I've done all this with my recent photos and syncd them to my Flickr account, if you want to check out the results: http://www.flickr.com/photos/efaller/
Furthermore, if you use WordPress for your blog, it's easy to install a Flickr plugin which creates a new "Insert Flickr Photo" button, which makes it super-easy to insert your photos into a blog post. You just click the one you want, and it automatically chooses a thumbnail of appropriate size, inserts it, and links it to the full-res version on Flickr. No need to mess with manually resizing the photo and using the WordPress upload screen any more. Here's an example:
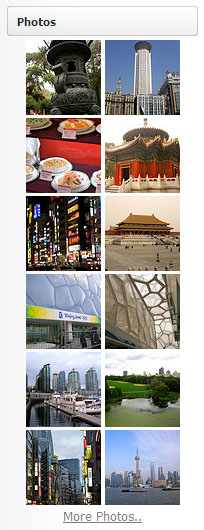
The plugin linked above also includes a handy sidebar widget that automatically displays a random selection of your photos, linked to Flickr:

All this without needing to manually upload anything! I expect that I'll be able to keep up with this system since it's so easy. There's no more excuse not to get all my good photos uploaded with the appropriate tags.


